
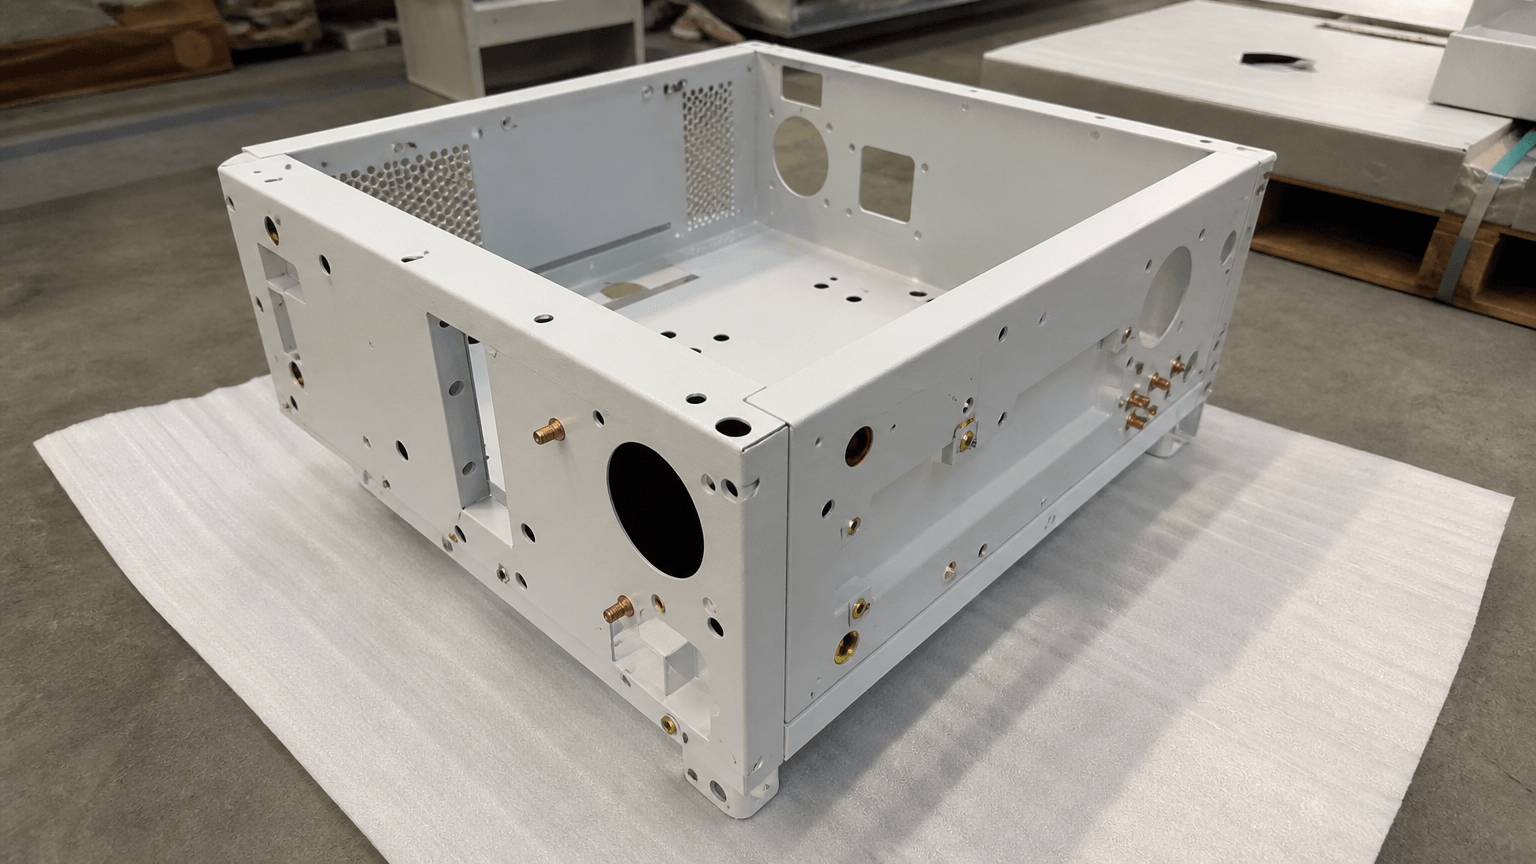
“Metal powder coated” describes a metal part that a finisher prepares, coats with dry powder, and heats so the powder melts and cures into a film. English normally uses “powder-coated metal” for the same finished state.
For an OEM drawing or RFQ, both phrases identify only a finish state. Before a prototype or batch, define the substrate, pretreatment, appearance, coverage, cure confirmation, inspection criteria, and assembly interfaces.
If a buyer sends a bracket or enclosure drawing marked powder coated black, the supplier still needs the material grade and thickness, color reference, gloss, texture, film-thickness requirement, masking details, and acceptance criteria. Those details let engineering and procurement review the sheet metal finishing route before parts reach assembly.
The finish label leaves the part underspecified
Buyers may describe a mild-steel bracket, aluminum cover, stainless steel enclosure, or galvanized frame as powder-coated metal. These substrates do not automatically share the same preparation or cure route. Engineering needs the substrate, service environment, visible surfaces, and functional interfaces before it can approve the process.
A complete note should state the material grade and thickness, color code or approved sample, gloss, smooth or textured finish, relevant film-thickness target or range, no-coat zones, cure confirmation, inspection method, and acceptance criteria. Without those details, a supplier can meet the words yet miss a fit or appearance requirement.
From fabricated metal to a cured coating
Metal powder coating is one finishing stage, not a substitute for fabrication or assembly. Laser cutting, CNC punching, bending, and welding can leave residues or create geometry that affects preparation. The team must review those upstream operations before it defines the finishing route.
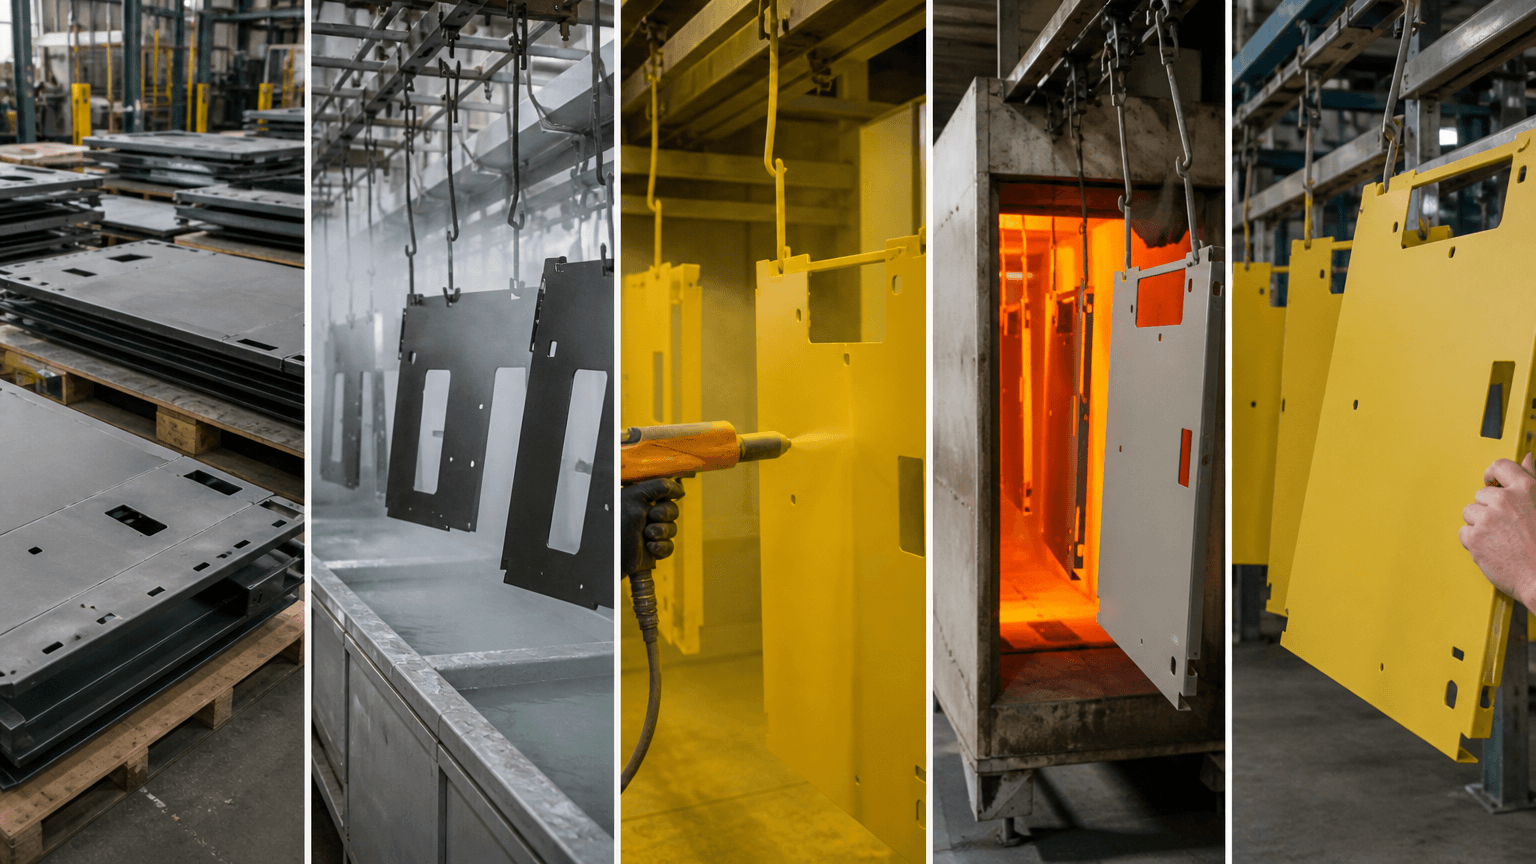
- Review the fabricated substrate. Before finishing, the team checks oil, burrs, oxides, rust, weld spatter, smoke residue, and other contaminants on edges, welds, recesses, and concealed faces.
- Clean and pretreat. The finisher removes oil and other contaminants, addresses rust, and selects phosphating, blasting, or another suitable pretreatment for the substrate and service environment. This step can affect adhesion, corrosion performance, and appearance.
- Apply the powder. The operator gives dry particles an electrical charge and directs them toward the prepared metal. Part geometry and line-of-sight conditions can influence coverage.
- Heat, melt, and cure. The curing process heats the part so the powder forms and cures into a film. The supplier confirms the cure window for the selected powder, substrate, part mass, and geometry instead of applying a universal temperature-and-time instruction.
- Inspect and protect the finish. Inspectors check appearance, coverage, masked areas, holes, threads, edges, dimensions, and assembly fit. Packaging and handling then protect the coated surfaces.
Poor preparation, unsuitable cure conditions, or weak edge and recess coverage can contribute to peeling, bubbling, under-film corrosion, or inconsistent appearance. These process-fit risks deserve review during design and sample approval.
Turn “powder coated” into a production-ready finish note
Use this OEM finish specification checklist in a drawing, finish brief, or RFQ. It keeps the requirement clear while allowing a review of custom sheet metal fabrication for powder-coated OEM parts.
- Material and condition: State the metal, grade, thickness, surface condition, and any unusual weld or machined interfaces. Identify whether the part uses mild steel, stainless steel, aluminum, galvanized steel, or another specified substrate.
- Pretreatment and powder route: Record the required pretreatment or performance requirement, selected powder system if specified, and service environment.
- Appearance: Provide a color code or approved physical sample, gloss level, smooth or textured appearance, visible surfaces, and agreed limits for variation.
- Film and cure: Give an agreed film-thickness target or range where coating thickness affects fit or performance. The supplier and buyer should confirm cure requirements against the selected powder and substrate rather than use a universal value.
- Coverage and masking: Mark no-coat or controlled-coat zones for threads, holes, grounding points, electrical contacts, mating faces, labels, hinges, slides, and other functional interfaces. Note whether plugs, caps, masking, or approved post-coating removal will protect those areas.
- Inspection and acceptance: Define the appearance class, viewing conditions, inspection method, defect limits, dimensional checks after coating, and functional acceptance criteria. Keep cosmetic requirements separate from fit, electrical contact, and assembly requirements.
- Quantity and approval: State prototype and batch quantities, batch structure, packaging sensitivity, required approval sample, and whether the order includes assembly after finishing.
Protect fit, contact, and assembly interfaces
Because the film adds thickness, a bare-metal fit does not automatically remain a post-finish fit. Review these interfaces on the drawing and inspect them after finishing.
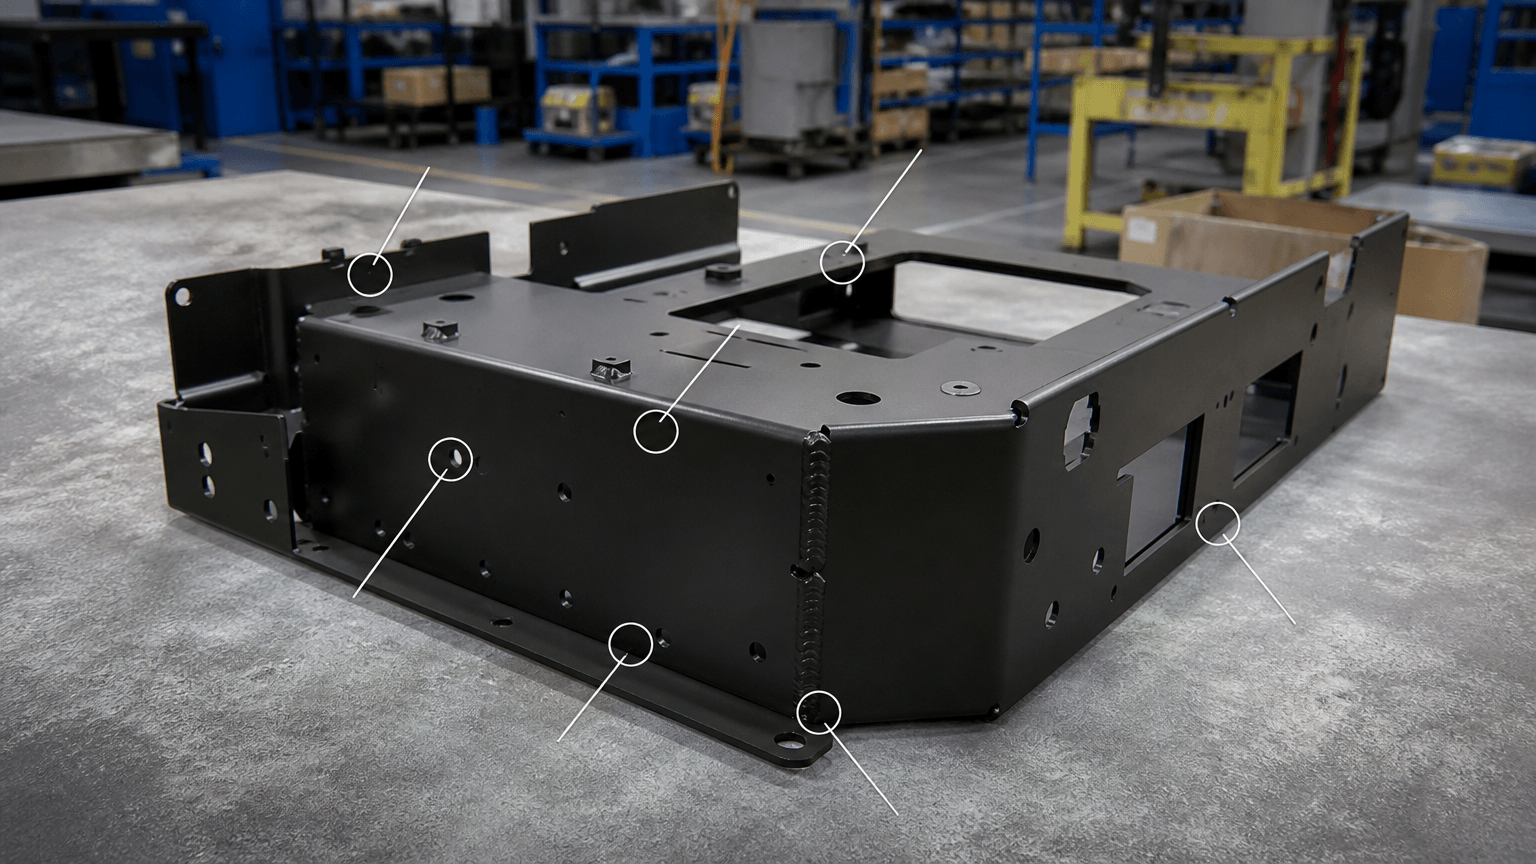
- Threads and holes: The coating can reduce usable thread engagement or hole clearance. Call out thread protection, plugs, caps, no-coat zones, or an approved method for removing coating after curing.
- Mating faces and moving parts: Identify surfaces that contact another panel, gasket, bracket, slide, hinge, or installed component. Check these interfaces after finishing.
- Grounding and electrical contacts: A grounding point is not an ordinary cosmetic surface. Specify bare metal or controlled coverage wherever conductive contact matters.
- Labels and hardware: Decide whether the team will install labels, hinges, and hardware before or after coating. Define whether a label needs a coated surface or a masked area.
- Machined components and geometry: A turned pin, milled block, or spacer used in the sheet metal assembly needs its own dimensional and finish callout. Also review sharp edges, internal corners, deep recesses, weld transitions, and concealed faces for coverage and appearance.
A simple coating map can show coated faces, no-coat zones, grounding points, and fit-critical surfaces. It provides more useful direction than one general note that does not identify functionally important holes or surfaces.
Choose the finish route by application conditions
Start finish selection with the substrate, geometry, service environment, interfaces, and production requirements. Also consider part dimensions, thermal exposure, appearance, masking complexity, batch size, and repair expectations.
| Finish route | Process distinction | Screen it when |
|---|---|---|
| Powder coating | The finisher deposits charged dry powder on prepared metal and heats it to melt and cure. | The substrate and geometry can accommodate thermal cure, coverage, and masking requirements. |
| Liquid paint | The finisher applies a wet coating system and then dries or cures it. | The product needs a low-temperature route, field touch-up, or specified wet-paint system. |
| Electroplating | An electrochemical process deposits a metallic layer. | The requirement calls for a metallic layer or electrochemical surface function rather than a cured powder film. |
| Anodizing | An electrochemical oxide treatment changes the substrate surface, commonly on aluminum. | The aluminum substrate, appearance, surface condition, and dimensions fit this route. |
| Galvanizing | A separate zinc-protection process protects steel. | The design needs zinc protection and the team has reviewed geometry, dimensions, handling, and downstream use. |
For a cabinet, bracket, frame, welded assembly, or powder-coated sheet metal enclosure ready for assembly, the same finish name can lead to different decisions. Let the product environment and functional requirements determine the route, not the finish label alone.
Approve a repeatable finish before batch production
A sample helps only when the team compares it with a written brief. Agree how procurement, engineering, and production will judge color, gloss, texture, coverage, fit, and defects before batch production.
- Resolve the brief. Agree on the finish note, coating map, cure confirmation, inspection method, and acceptance criteria.
- Approve a representative sample. Compare visible appearance, edges, welds, holes, threads, and masked areas under agreed viewing conditions. Record intentional bare areas.
- Inspect function after finishing. Check critical dimensions, hole clearance, thread engagement, mating faces, hinges, slides, grounding points, and installed hardware.
- Separate cosmetic and functional decisions. A hidden-face variation may be acceptable, while a visually good finish can still fail fit, movement, or electrical contact.
- Control later batches. Retain the approved sample, defect limits, inspection method, and batch-comparison criteria. Record intentional changes to material, powder, pretreatment, masking, or cure.
Use the approved reference and written criteria for batch acceptance, not only a description such as black powder coated. For inspection support, see Yishang’s quality control and inspection for finished metal products.
Where RFQ Assumptions Create Cost and Production Risk
Many sheet metal fabrication problems begin before production starts. If drawings, tolerances, finish expectations, material grades, or assembly requirements are unclear, suppliers may quote based on different assumptions. That can make prices difficult to compare and may lead to rework, cosmetic rejection, assembly misalignment, or production delays later.
For OEM buyers, the goal is not simply to request the lowest price. The goal is to make sure each supplier is quoting the same manufacturing reality. Before confirming an order, clarify which dimensions are fit-critical, which surfaces are cosmetic, whether prototypes must match batch-production conditions, and how finished parts will be inspected.
Frequently Asked Questions
These questions address details that buyers often leave unresolved when an RFQ or drawing states only metal powder coated.
Is “metal powder coated” the same as “powder-coated metal”?
Yes. Both describe metal with an applied and thermally cured powder coating. “Powder-coated metal” is the more natural English wording, but neither phrase defines the complete production requirement.
Can stainless steel, aluminum, galvanized steel, and mild steel all be powder coated?
They may suit powder coating, but they do not automatically follow the same process route. Pretreatment, powder selection, cure compatibility, surface condition, geometry, and service environment require a separate review for each part.
Will powder coating affect threads, holes, grounding points, or close-fitting parts?
It can. The added film may affect clearance, thread engagement, electrical contact, or movement. Drawings should identify no-coat or controlled-coat zones, and the team should check relevant features after finishing.
Is powder coating the same as spray painting or liquid painting?
No. Powder coating uses charged dry powder followed by heat-based melting and curing. Liquid painting applies a wet coating system, so the processes and selection requirements differ.
What should an OEM buyer send when requesting a powder-coated metal part?
Send the 2D drawing and 3D CAD files, if available, material, thickness, critical tolerances, color code or approved sample, gloss, texture, film-thickness needs, masking and grounding requirements, service environment, acceptance criteria, quantity, and assembly scope.